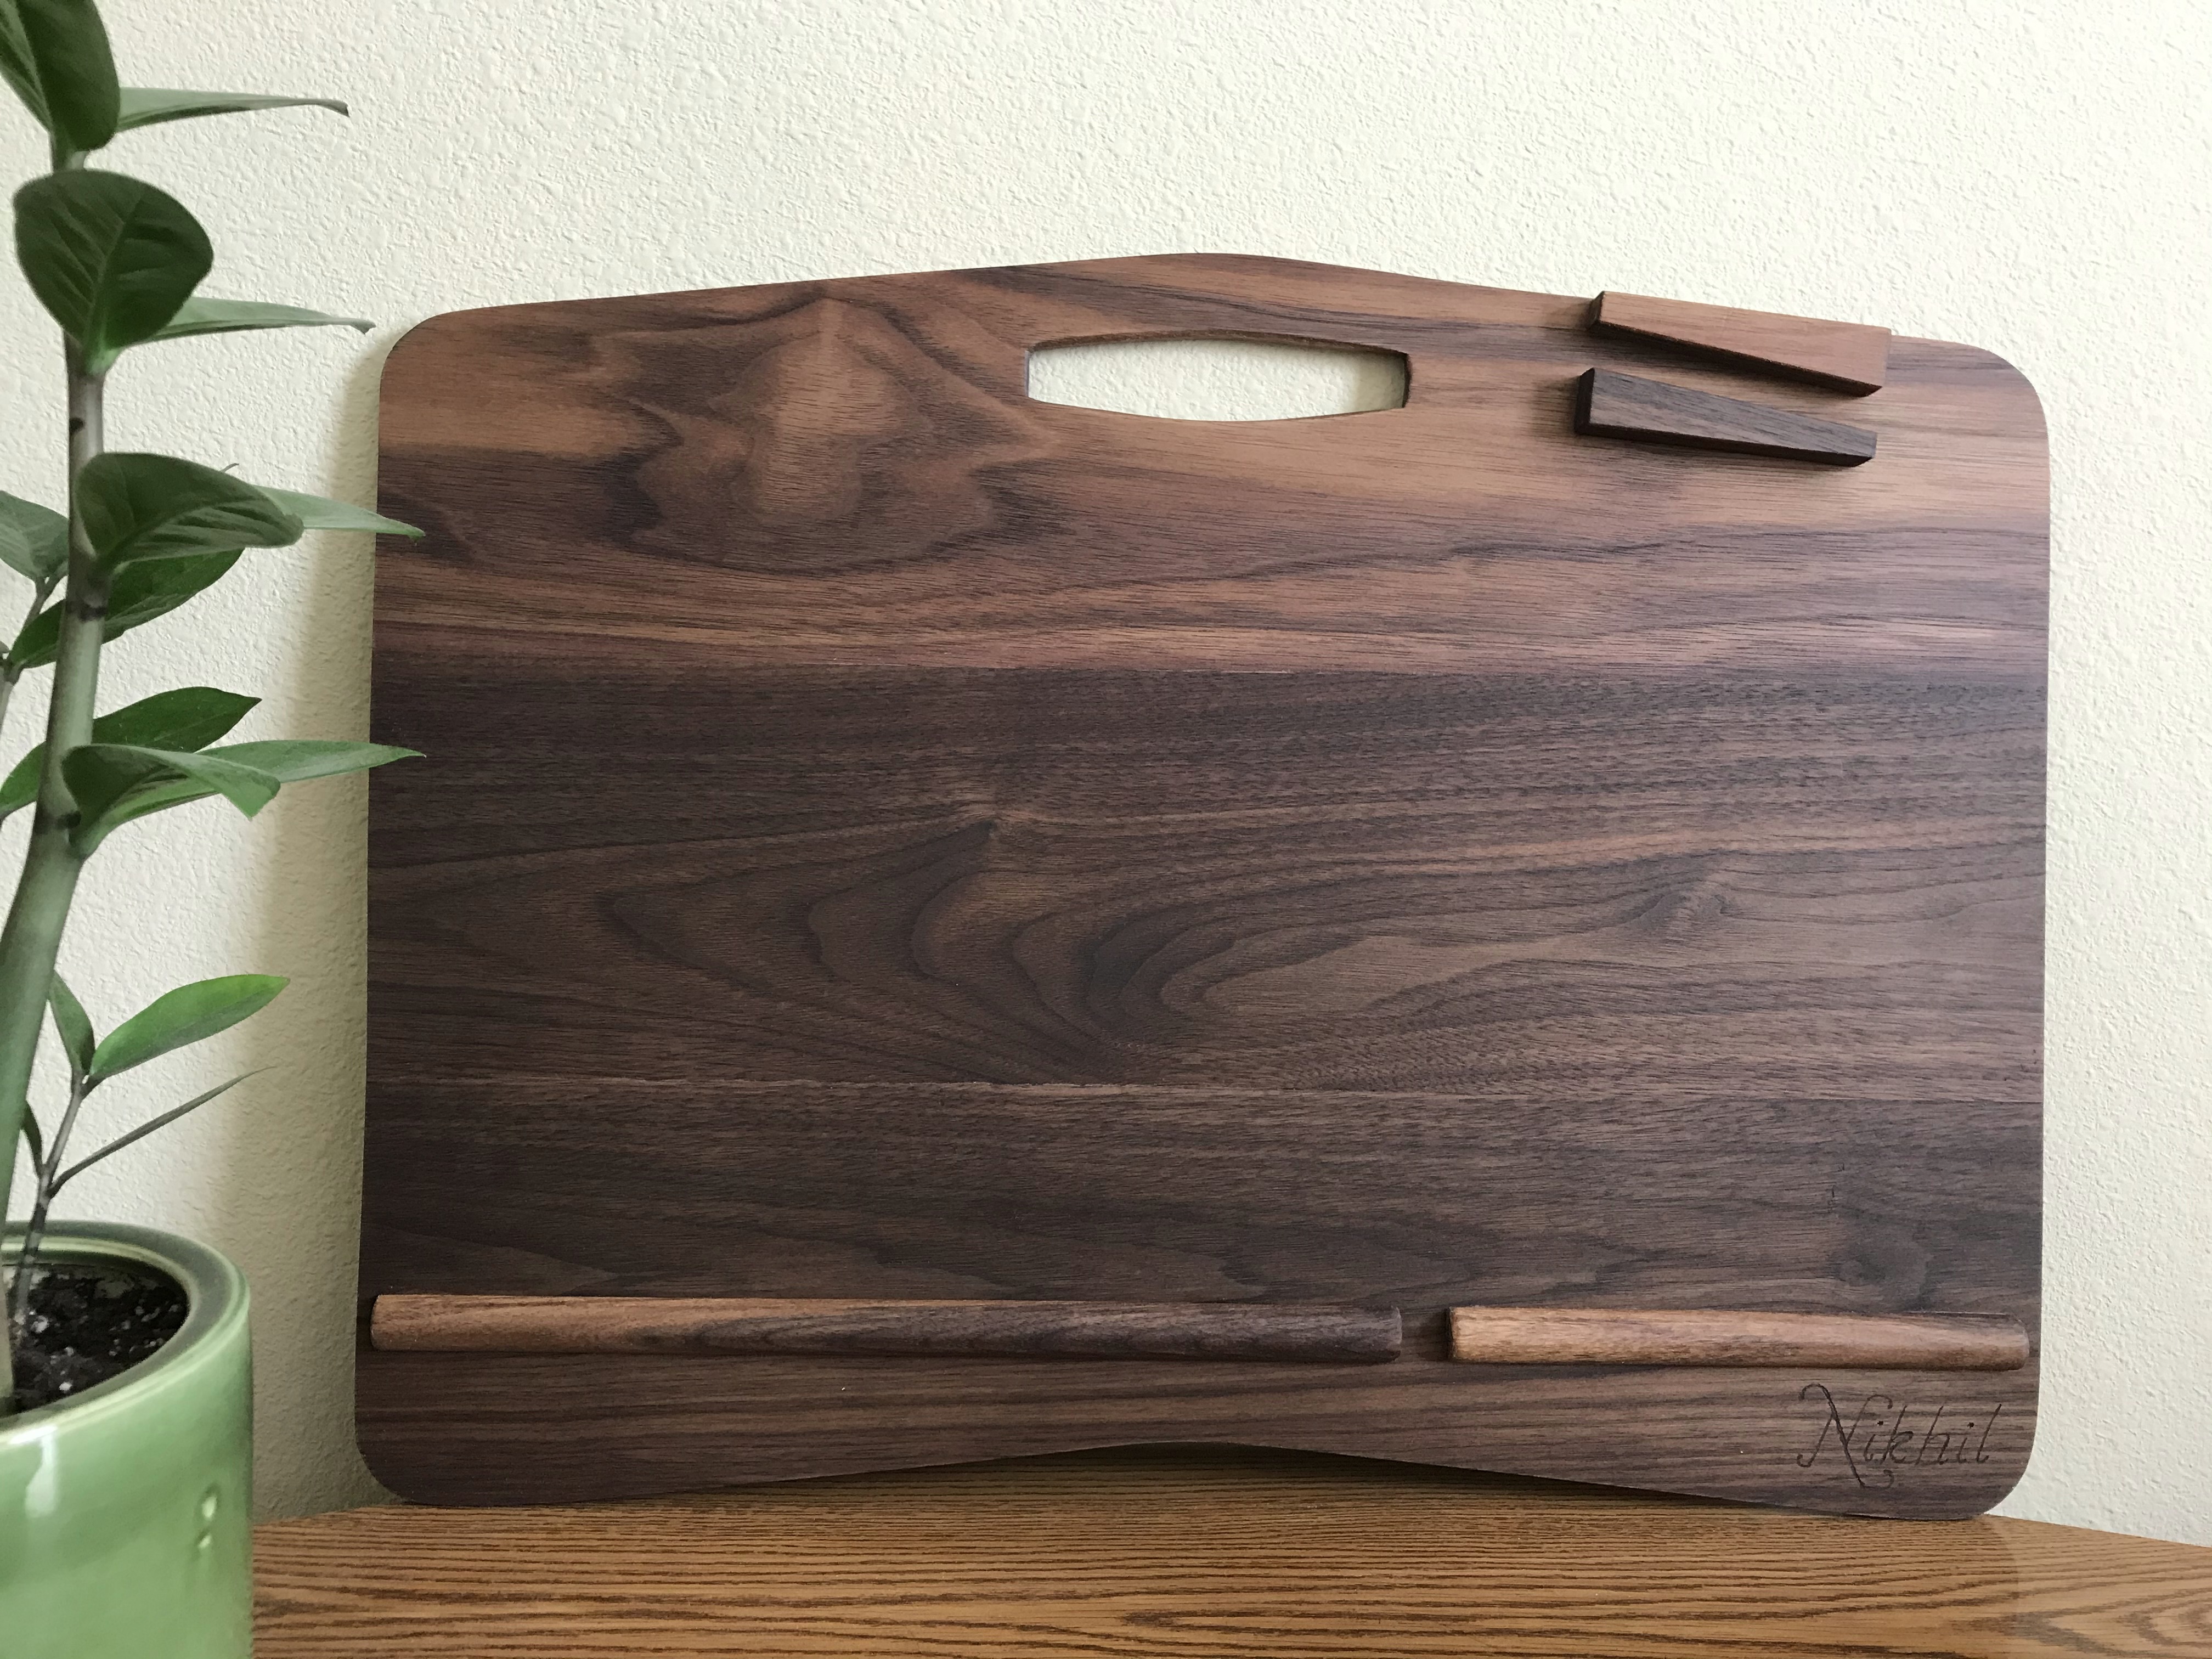
The walnut lap desk was my first experience creating a product without a plan. Each feature was designed on the spot. I gave it a surface area that would hold a laptop and small notepad, designed the shape of it to be geometric and curve around the body, and added a phone stand and wrist bumper to keep items in place. The grain layout gave it character, while the oil finish brought out a classic dark look. It was a strong, sleek, beautiful build from start to finish.
See the slides below to learn more about the build.

Walnut Lap Desk: Project Walkthrough >>> 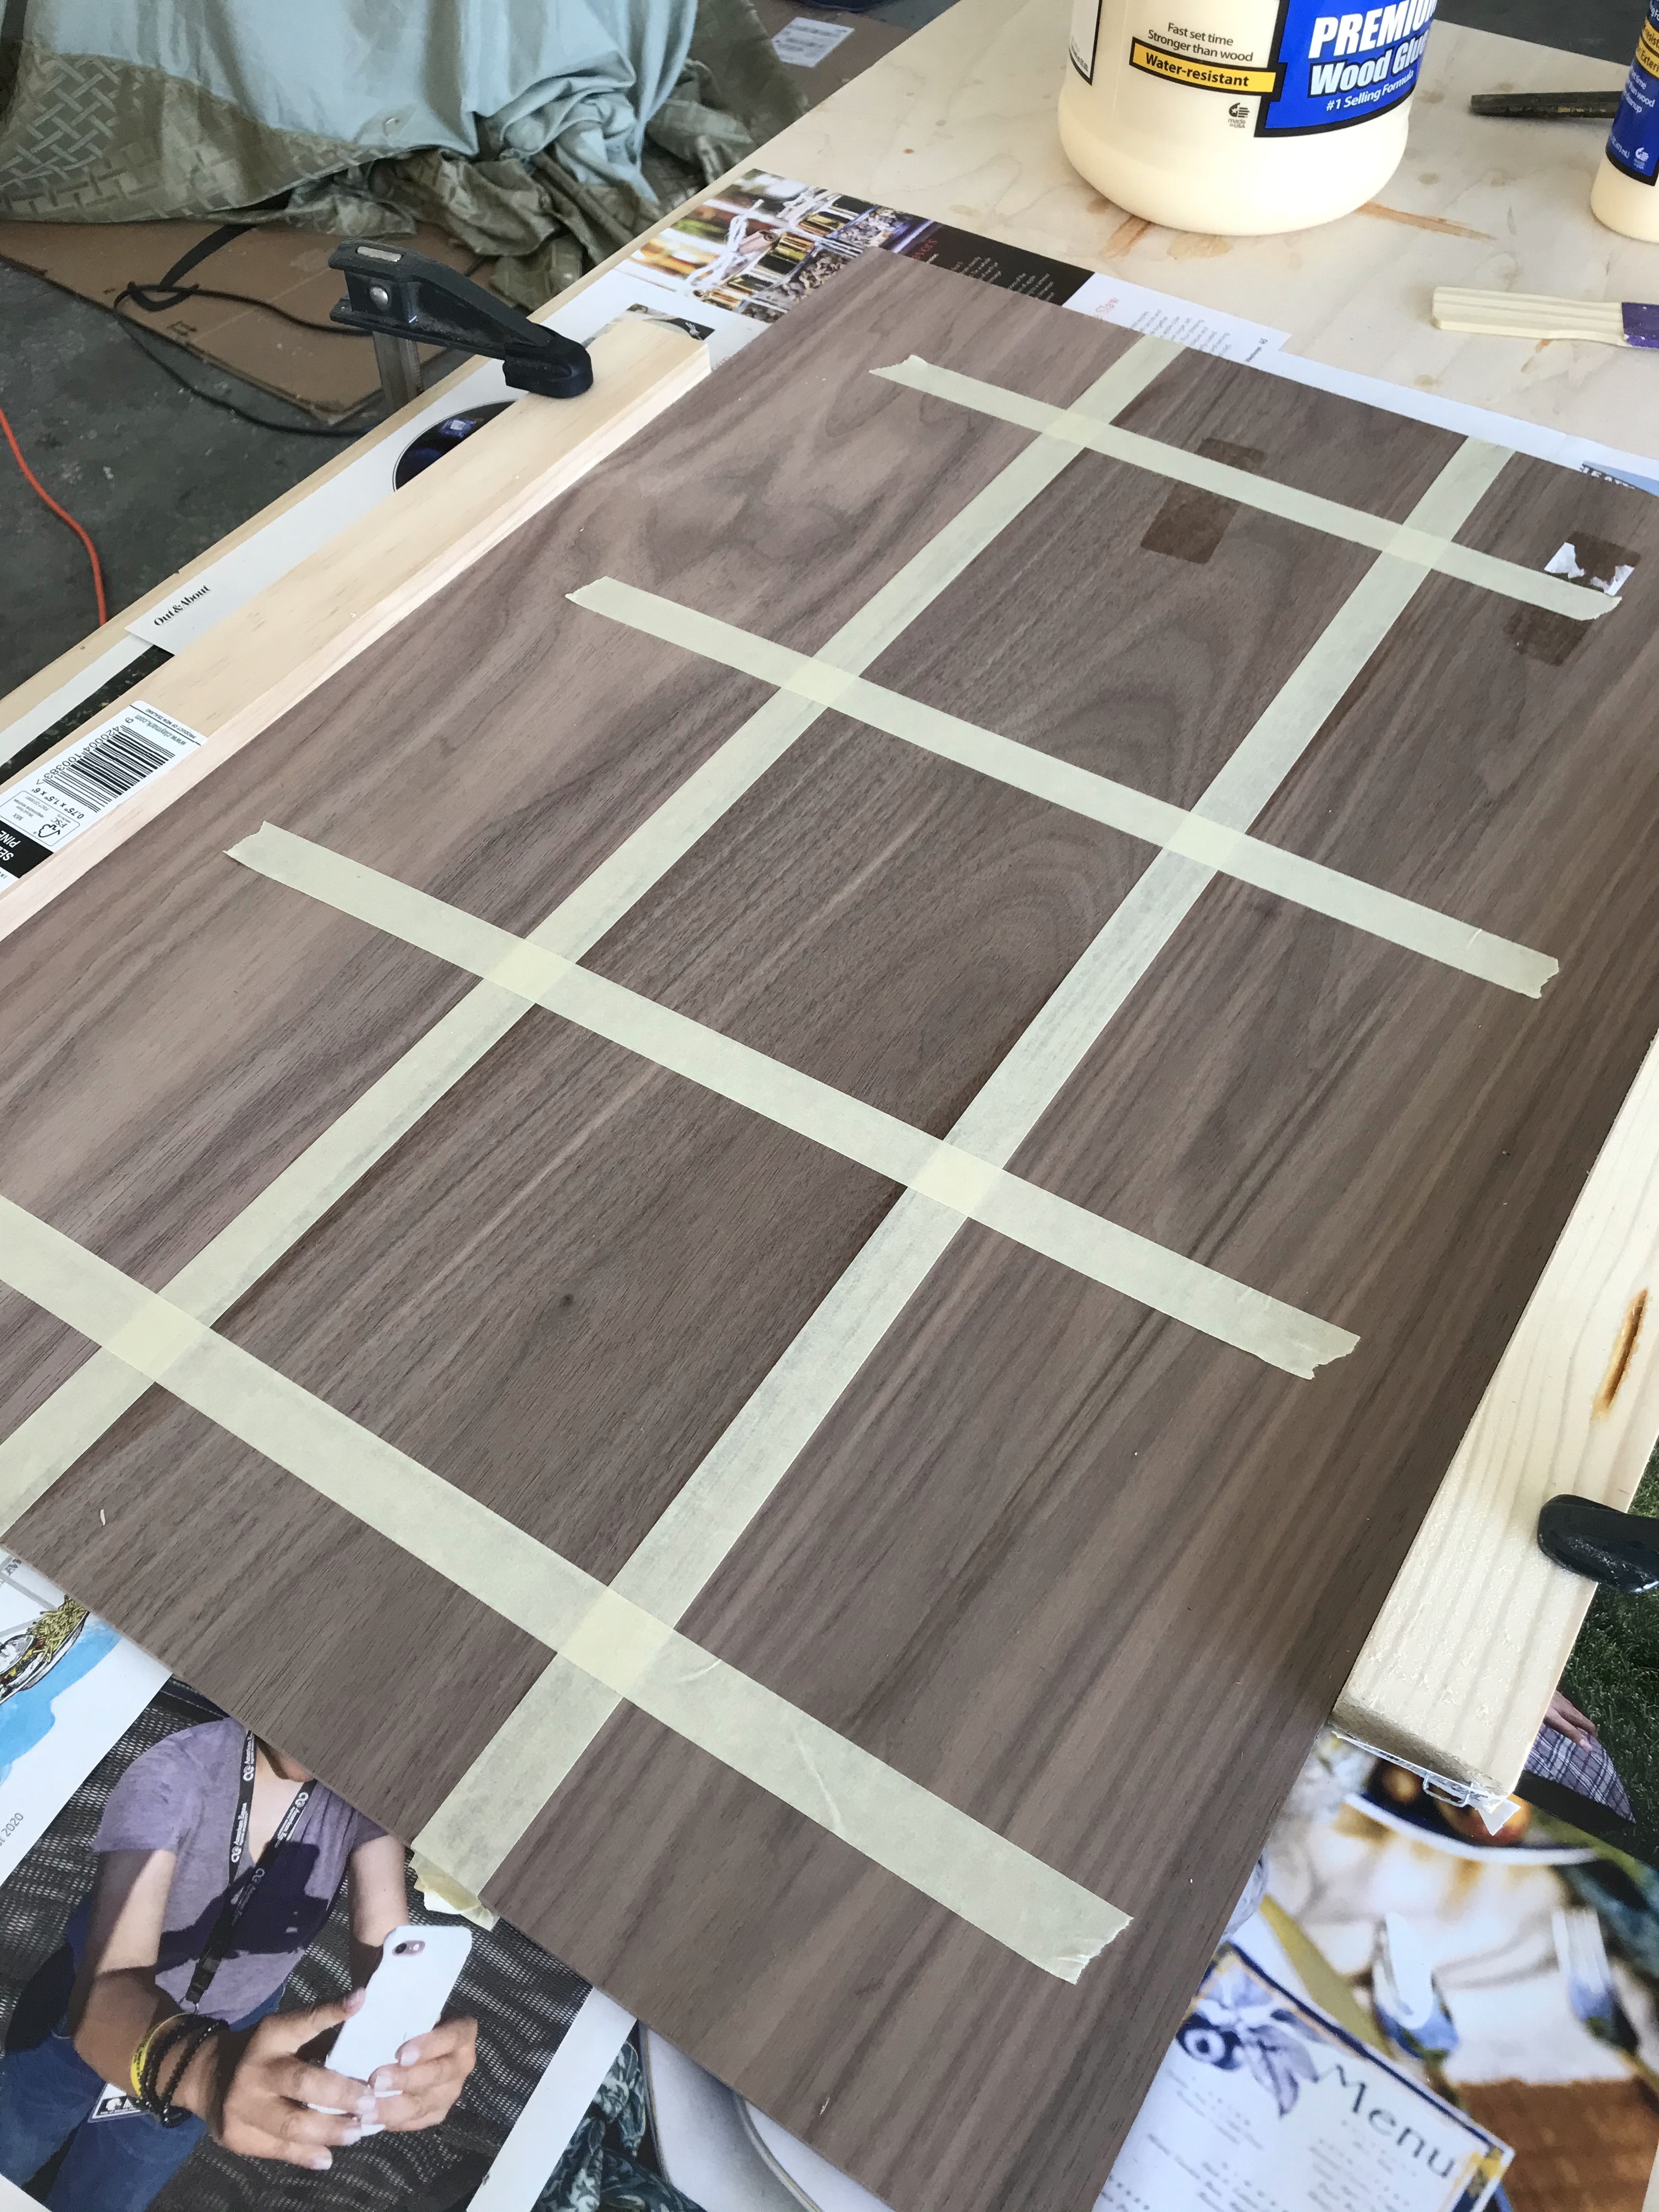
First I had to do a panel glue-up of 3 1/4″ walnut panels. Because it was rather thin, this tape method of panel gluing actually helped more than parallel clamps. 
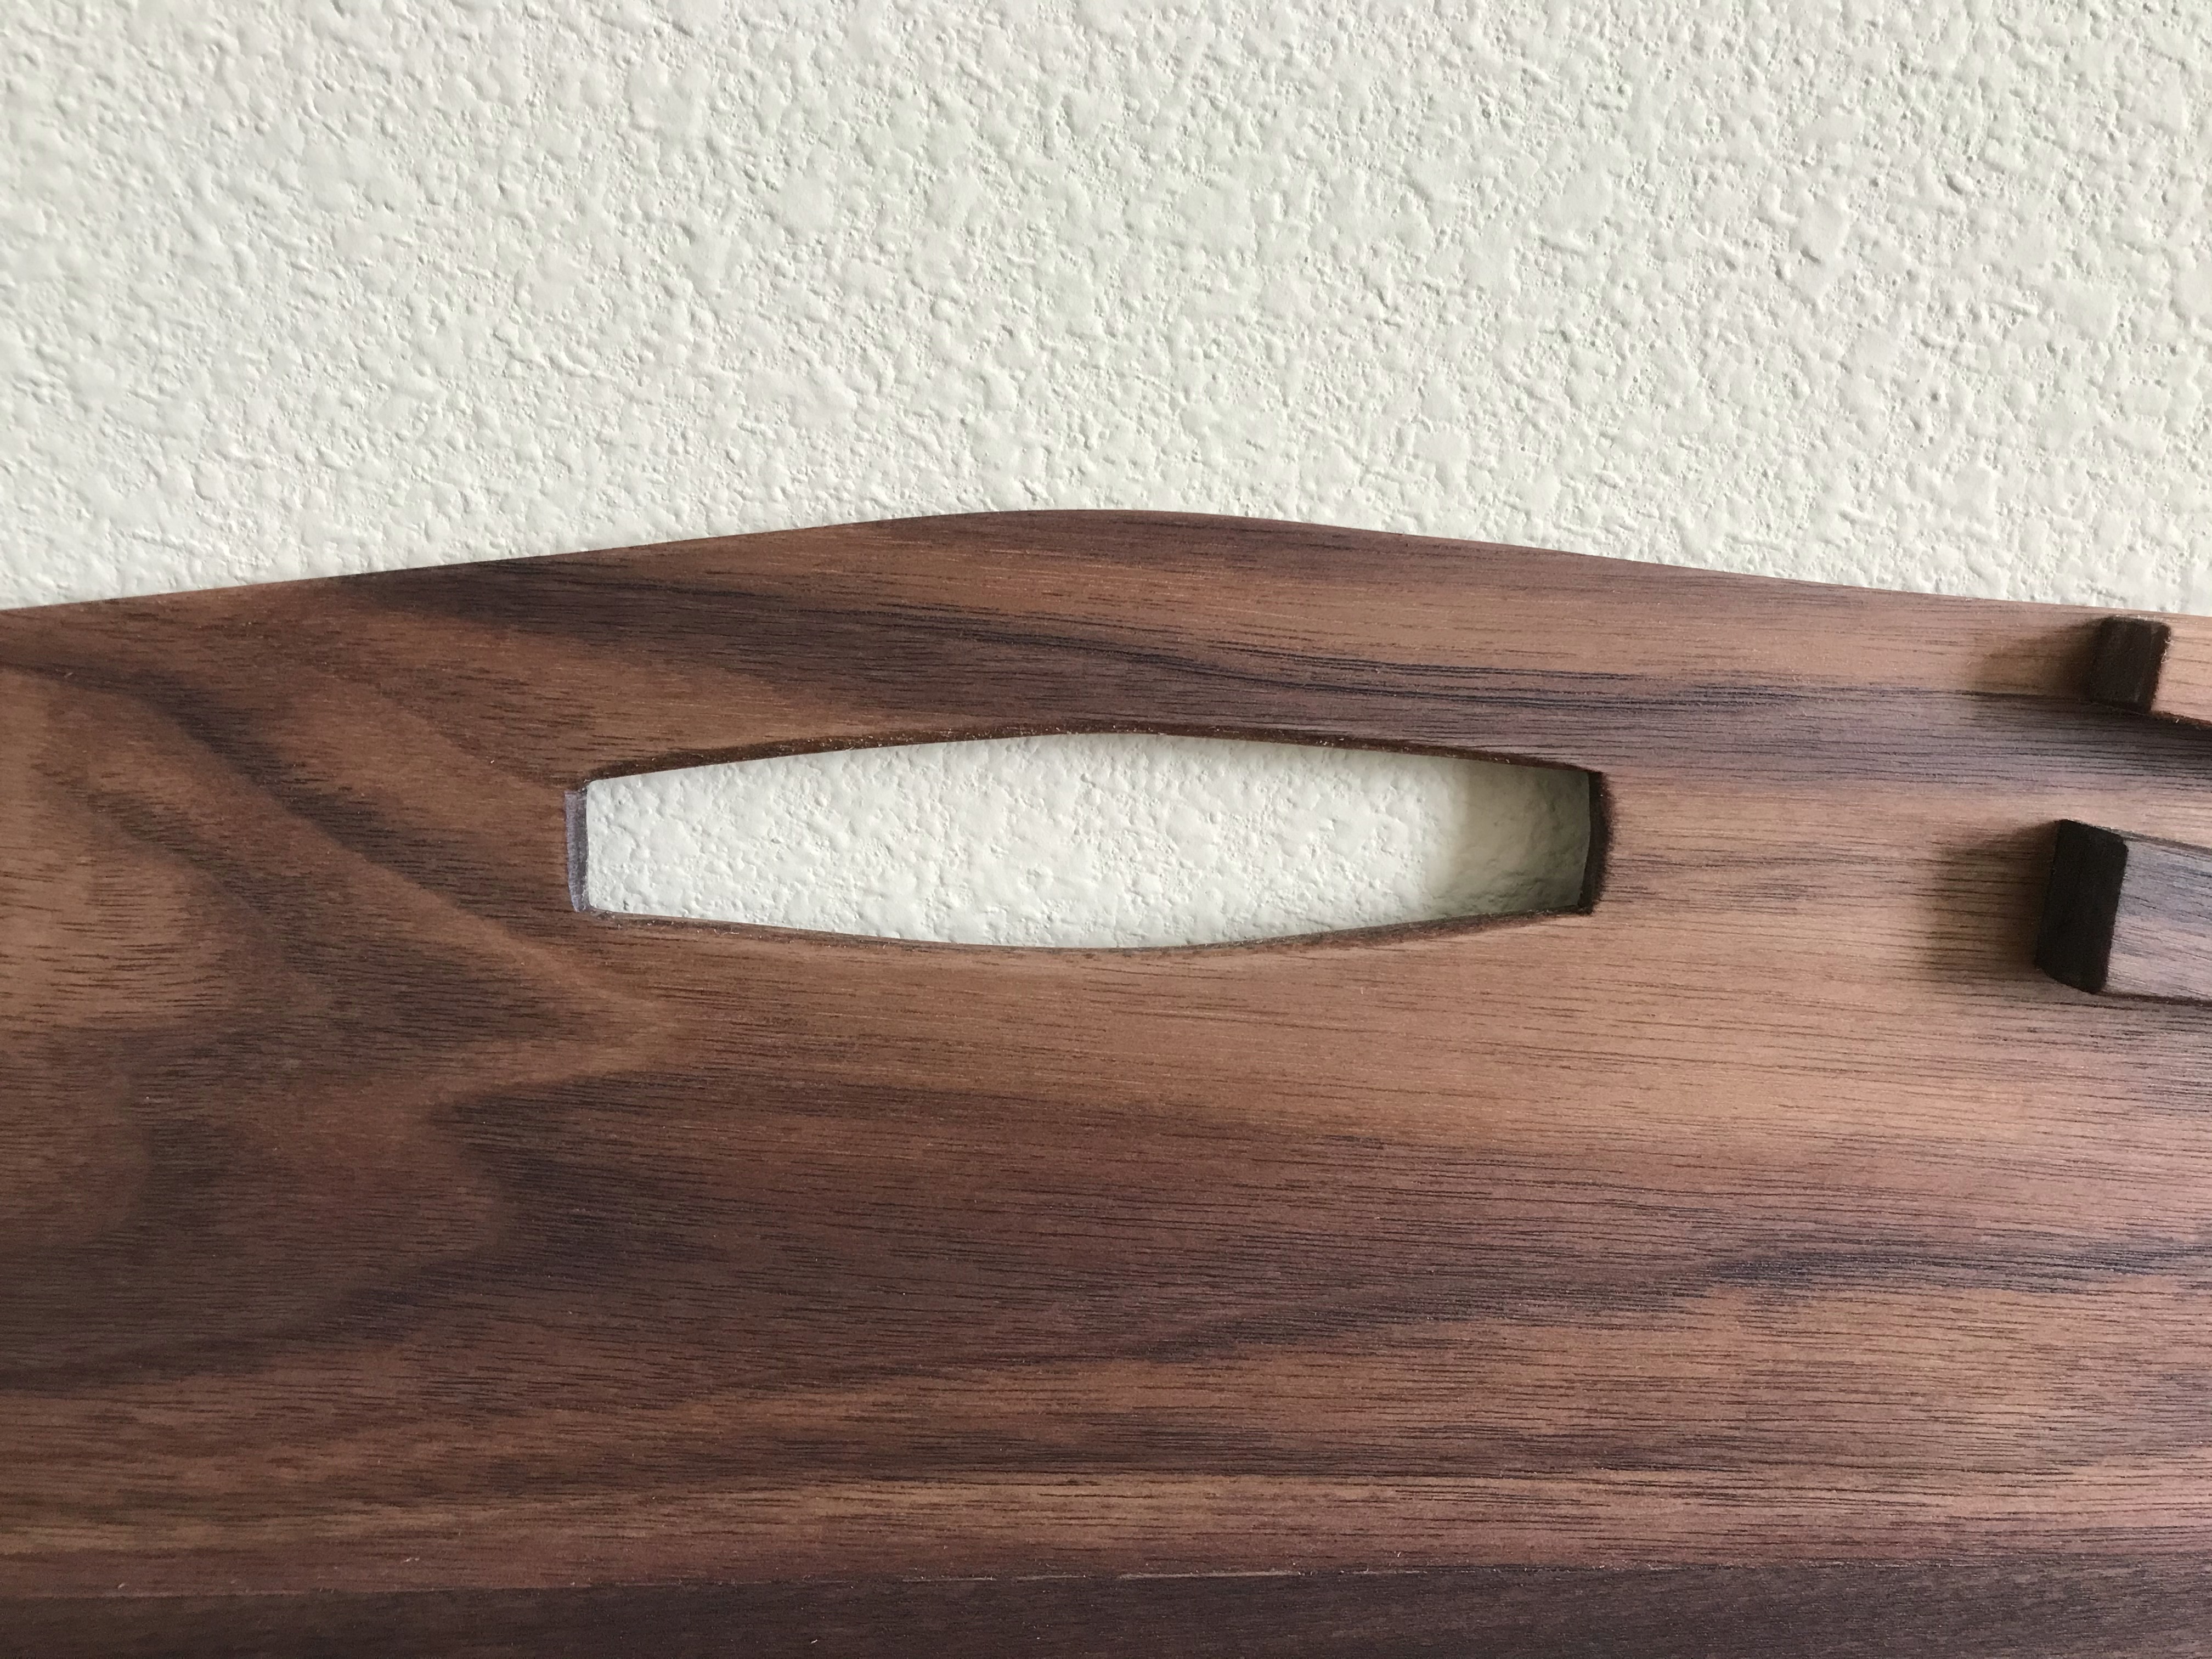
Once it dried, I removed the tape and cut the panel into the desk shape. Curves on the bottom and in the handle help with comfortable use, and the symmetry of the top curve was pleasing to the eye. 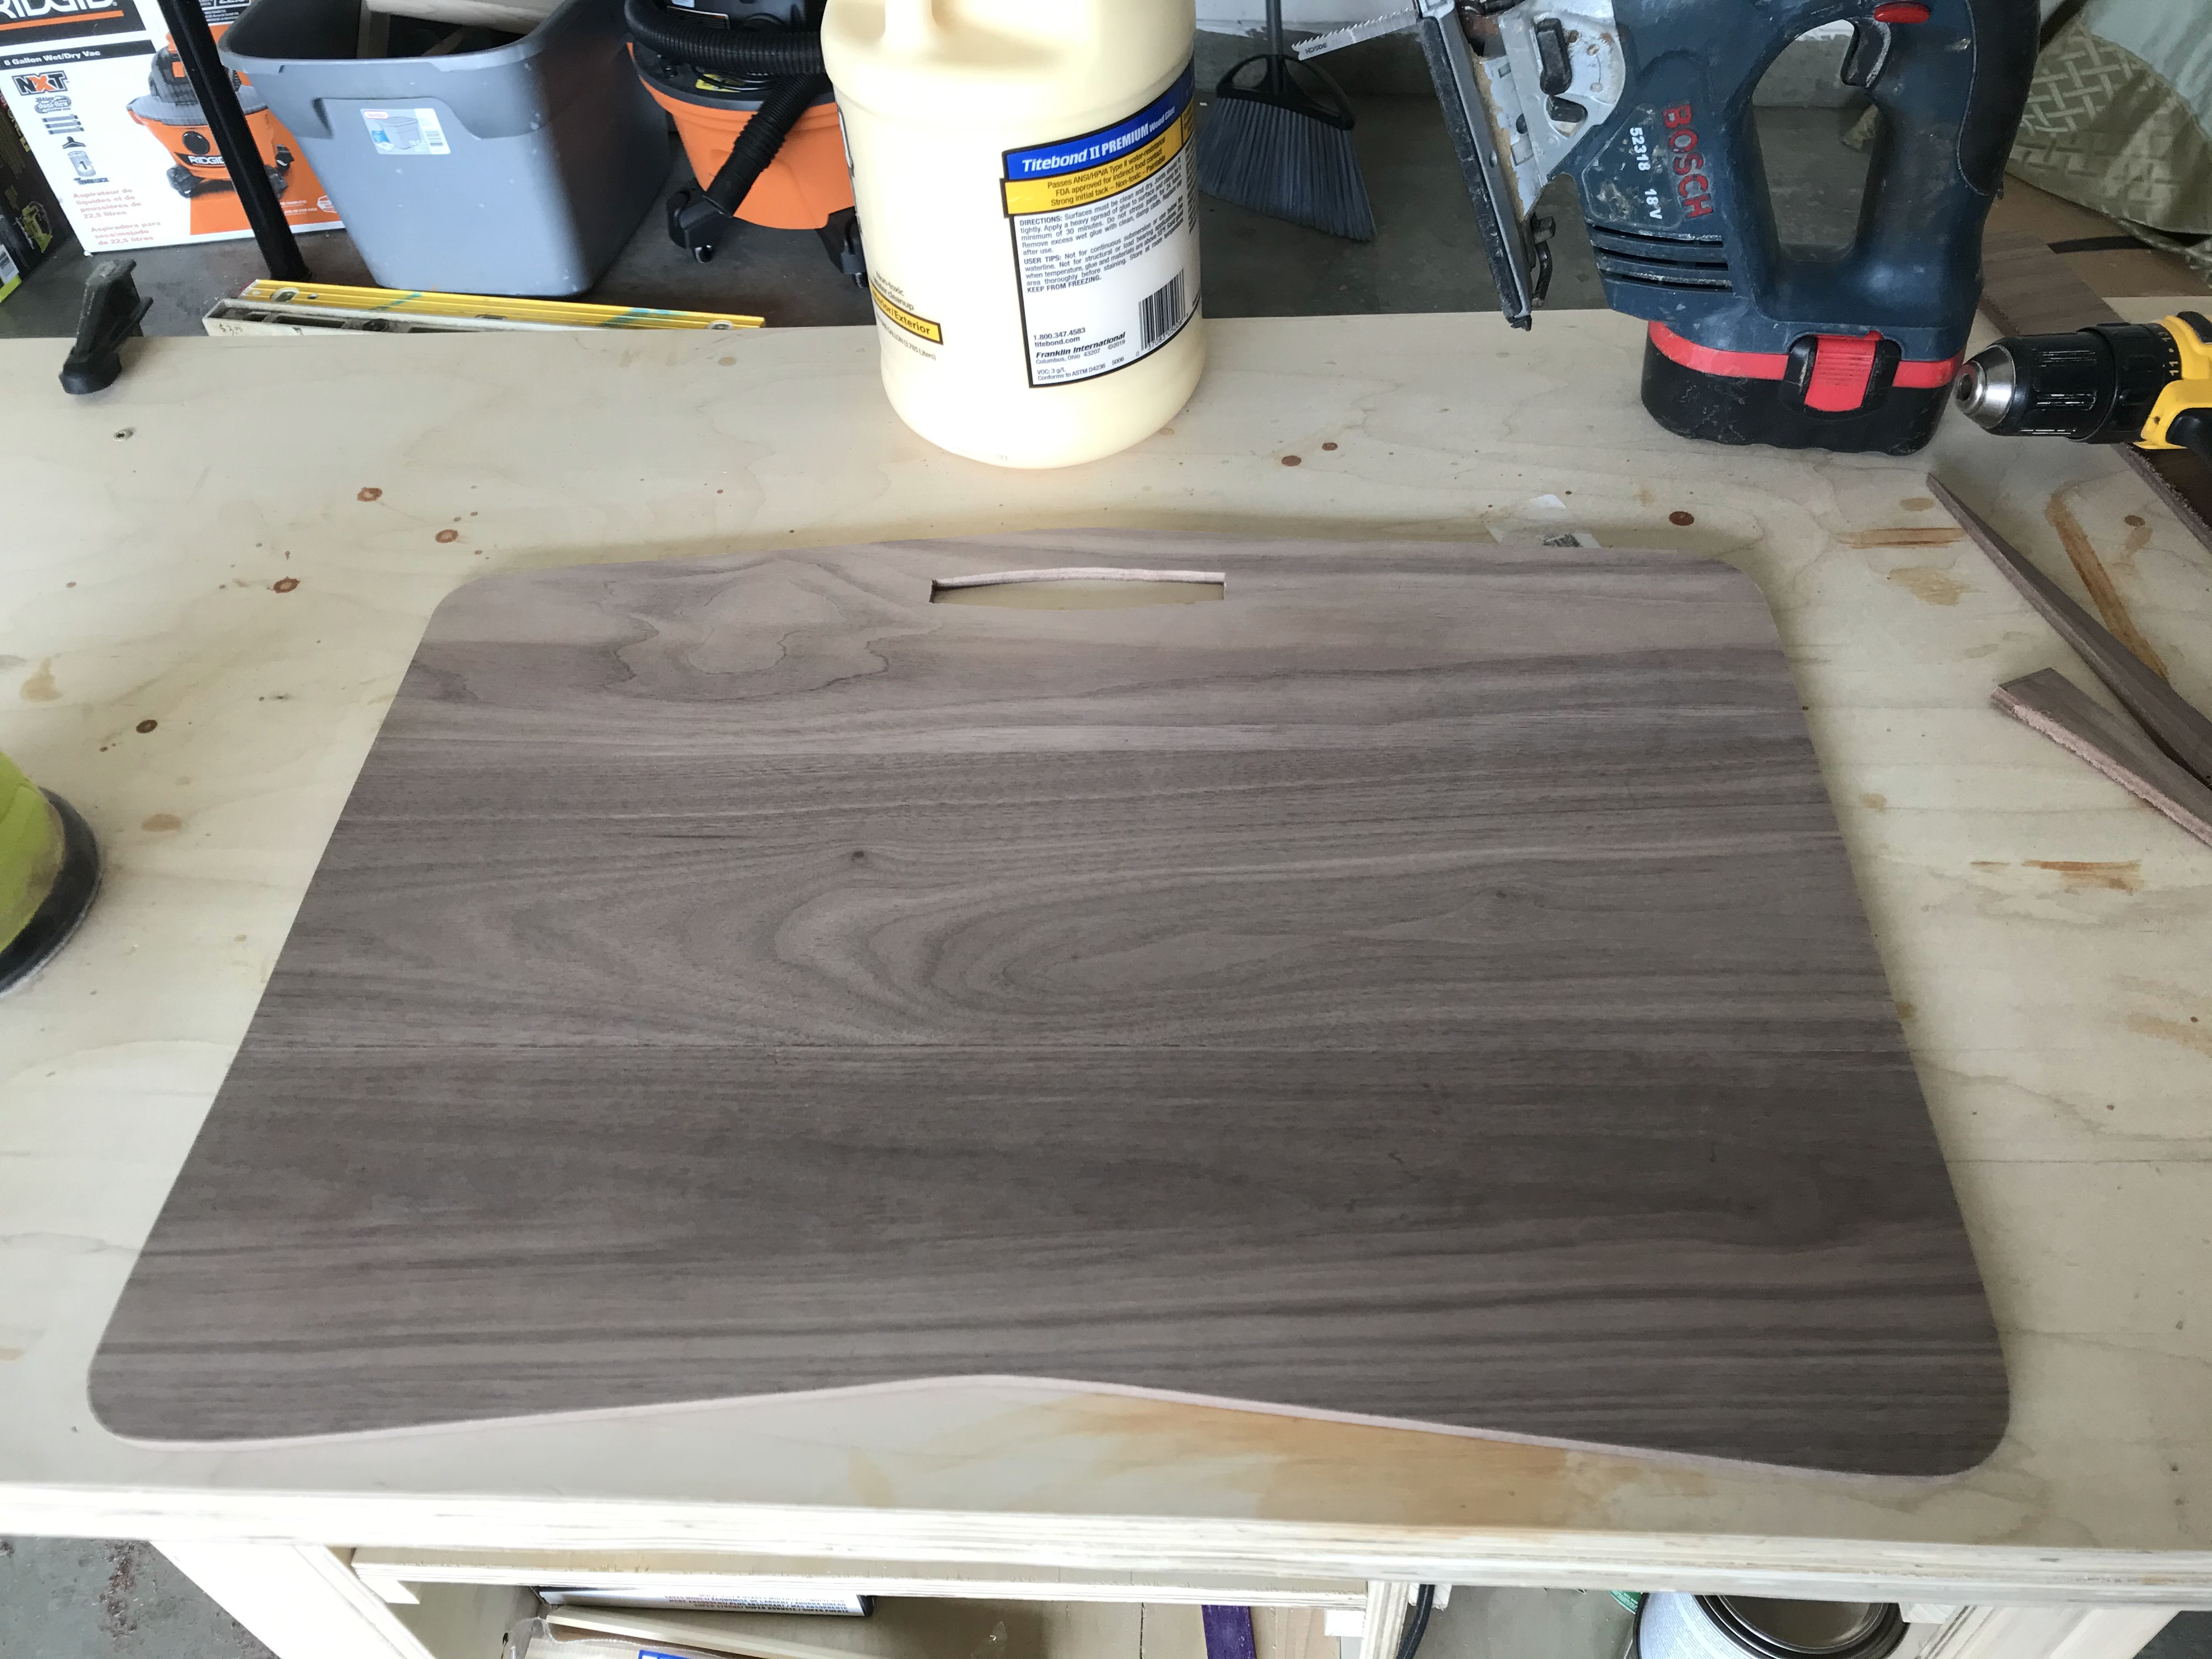
Sanded down until the glue seams were invisible, and edges were rounded. 
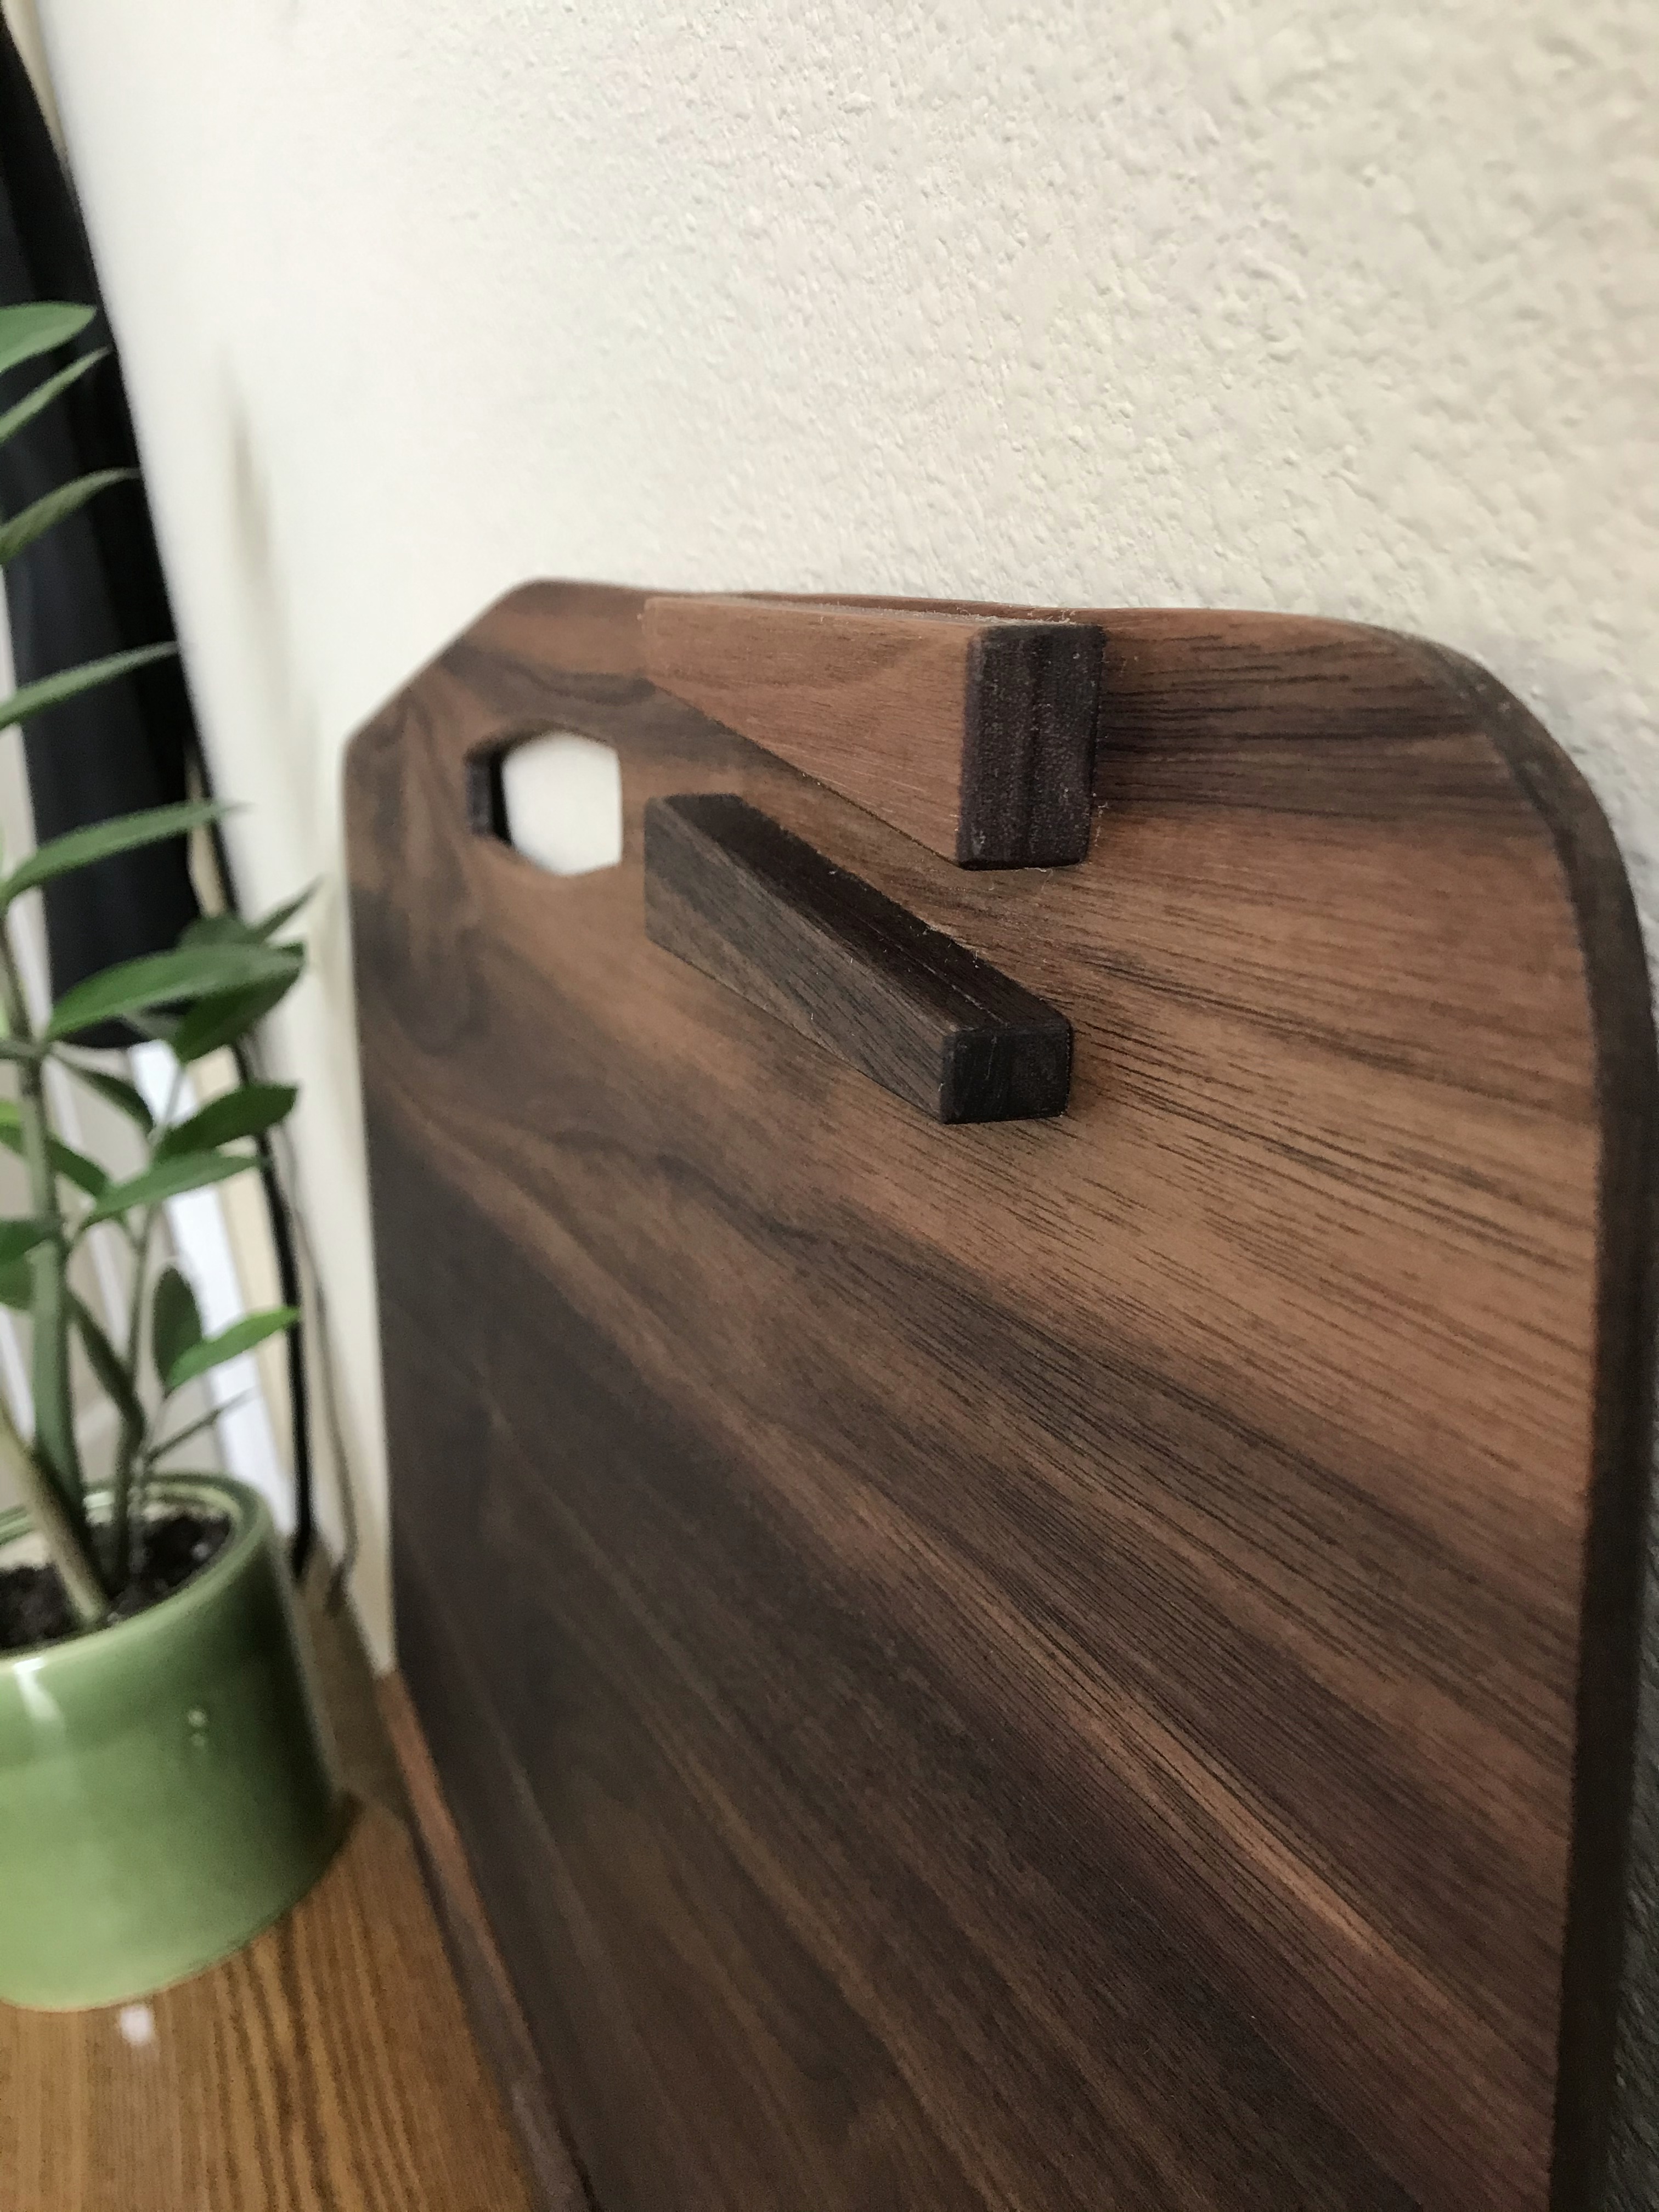
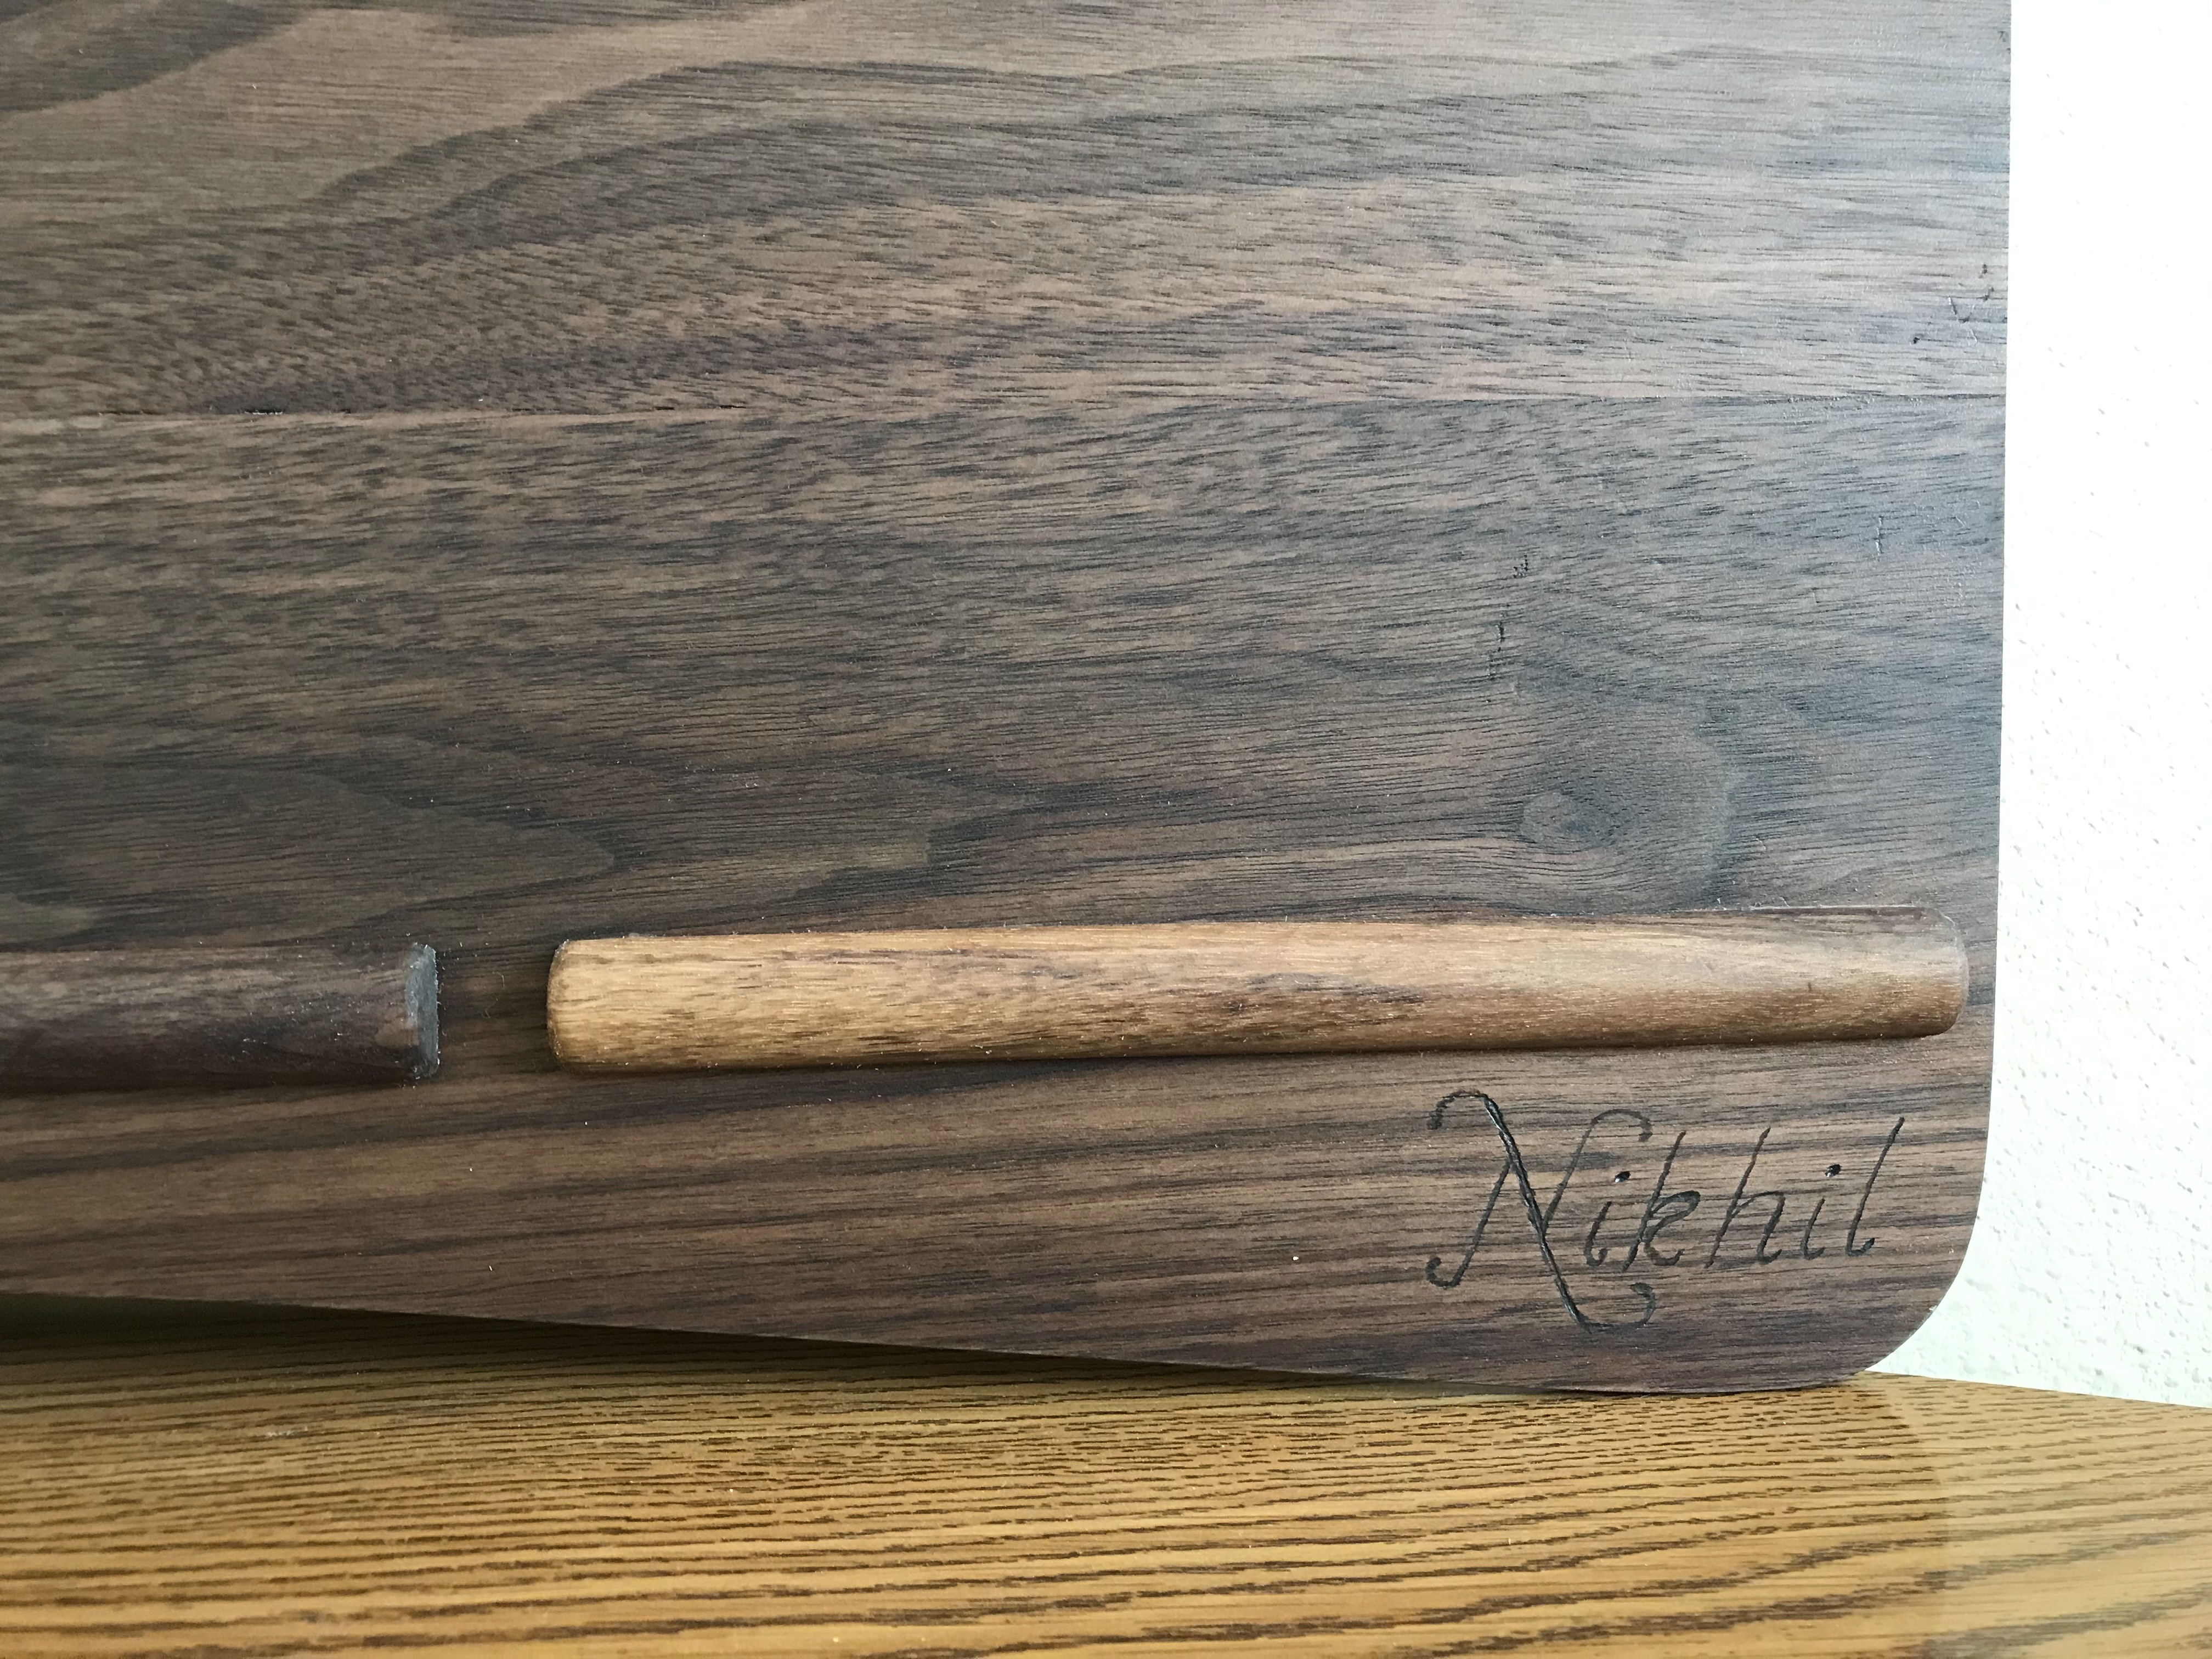
Added bumpers and phone stand features using scrap wood. I laid the dark wood of the phone stand on the lighter part, and kept the light sides of the bumpers on the dark bottom of the panel. This could have been smoothly blended in with the color gradient, but I liked the contrast. The magazine page is a template of the laptop dimensions. 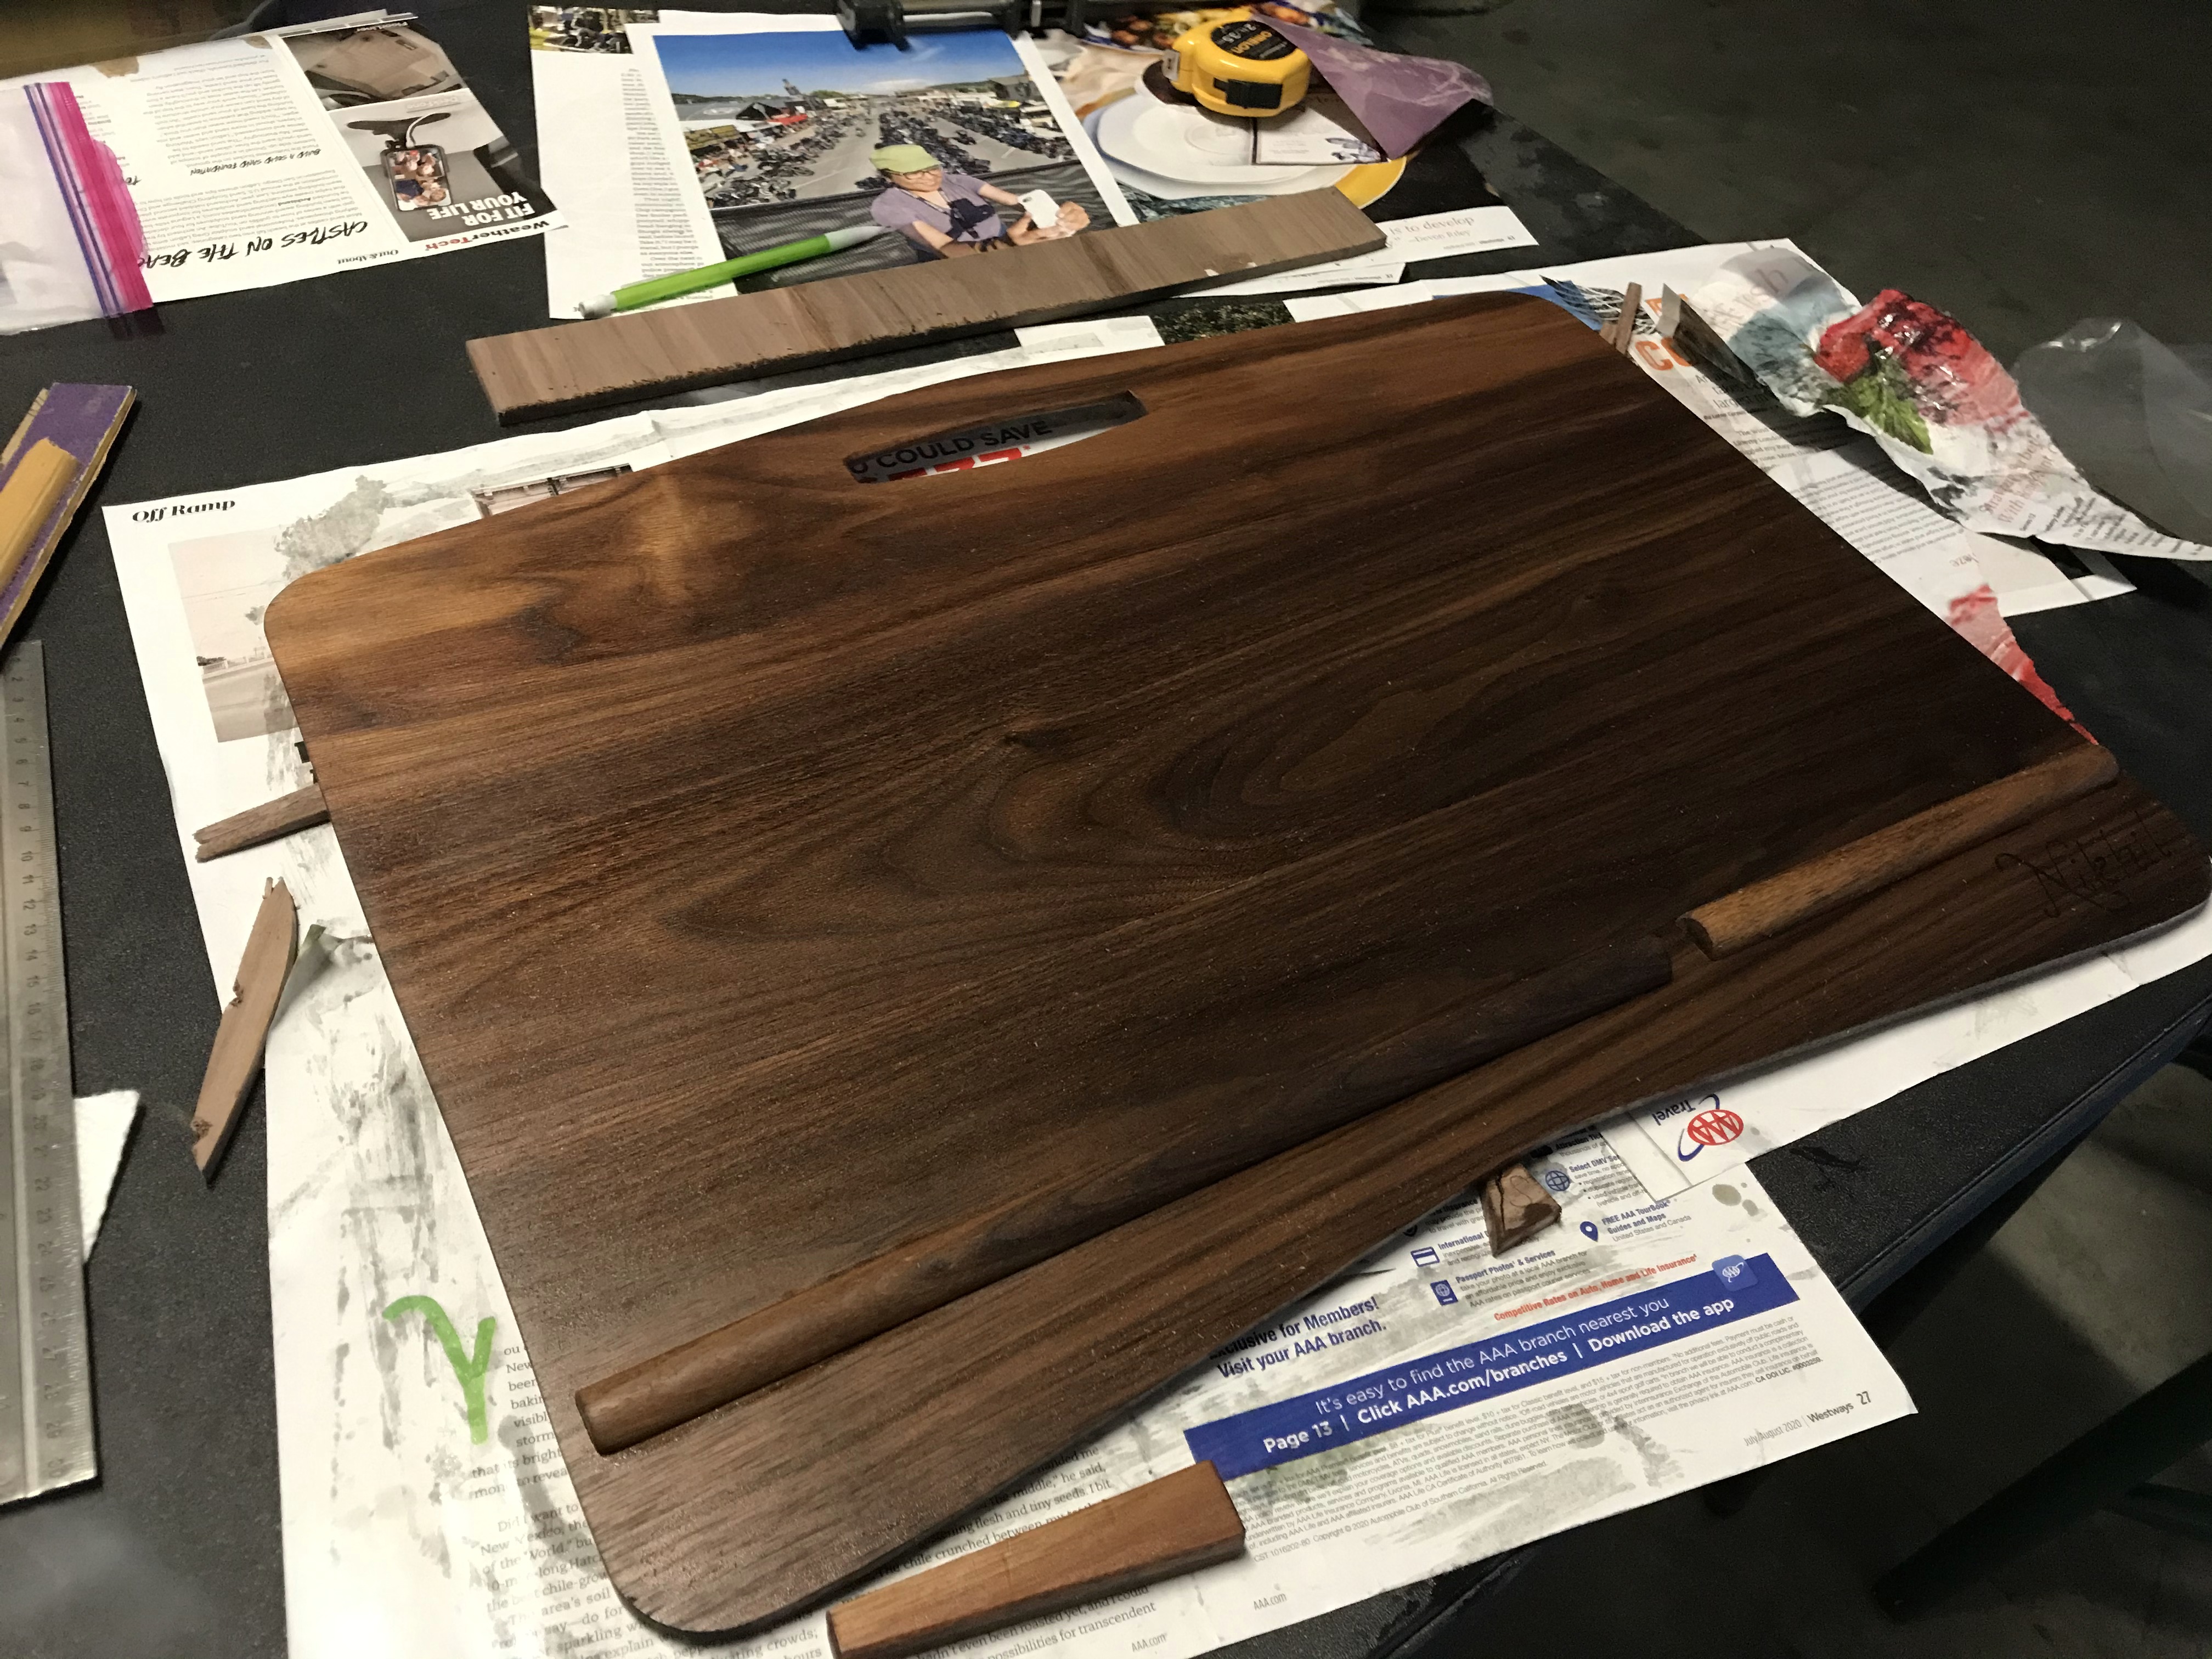
Finished with 3 coats of Danish oil. This was my first use of Danish oil and it really came out perfect. 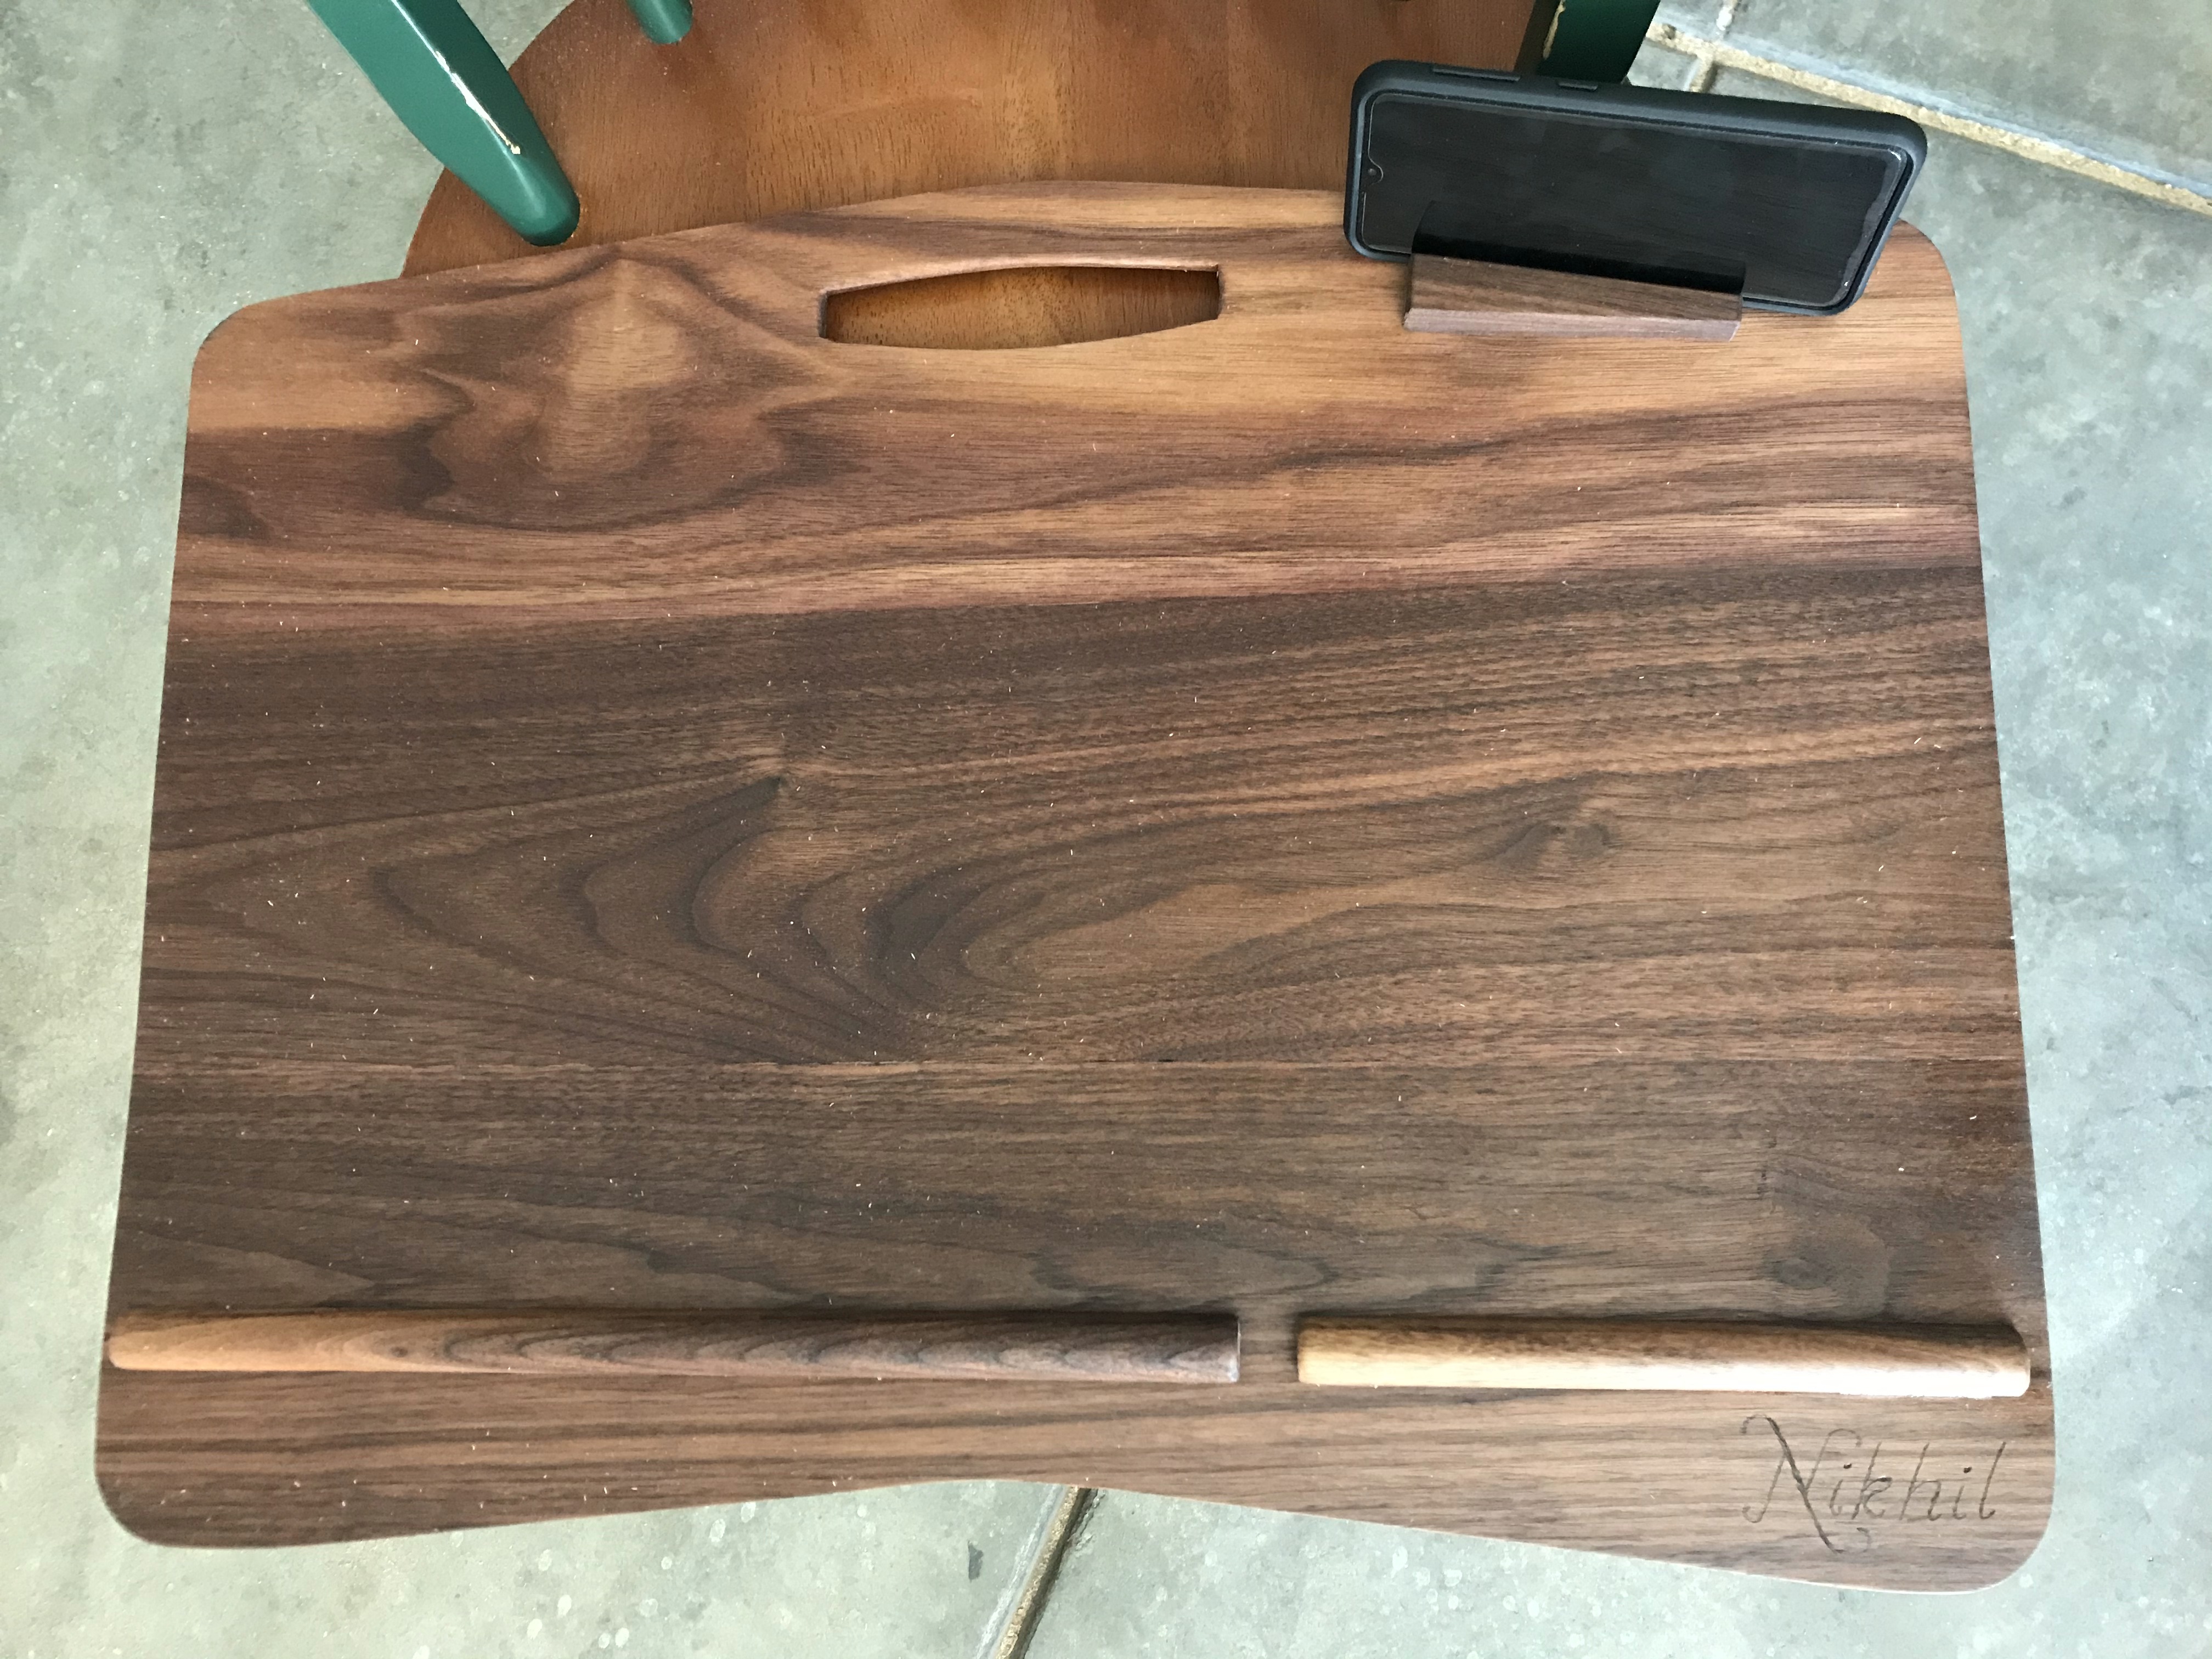
Glued the bumpers and phone stand down. 
Sewed a cover for a memory foam pillow, and velcroed the whole thing onto the bottom for a lap cushion.
Finished Product